Showing posts with label Guides. Show all posts

How to make grass in the air + general grass mixing tips

|
This guide will help you blockmix grass in the air. This is pretty basic blockmixing, and it's in fact exactly the same procedure as when you make water in the air (but I will add some grass-specific tips and tricks).

This guide presumes you already know how to use ChallengeEdit (CE), or other CE-based blockmixing programs (like TS). If you don't, google some guides or read the water mixing article I linked above.

To make grass, we need to transform blocks. The first thing you have to do is to add transformable blocks (a block that does not exist yet in your track) to your track. The blocks don't have to be placed the exact same place you want the grass to appear, as you can move them afterward. It is of course faster and easier to place them the exact same place if it's possible for you.


Every image except the CE image can be shown in a big version by clicking the image.

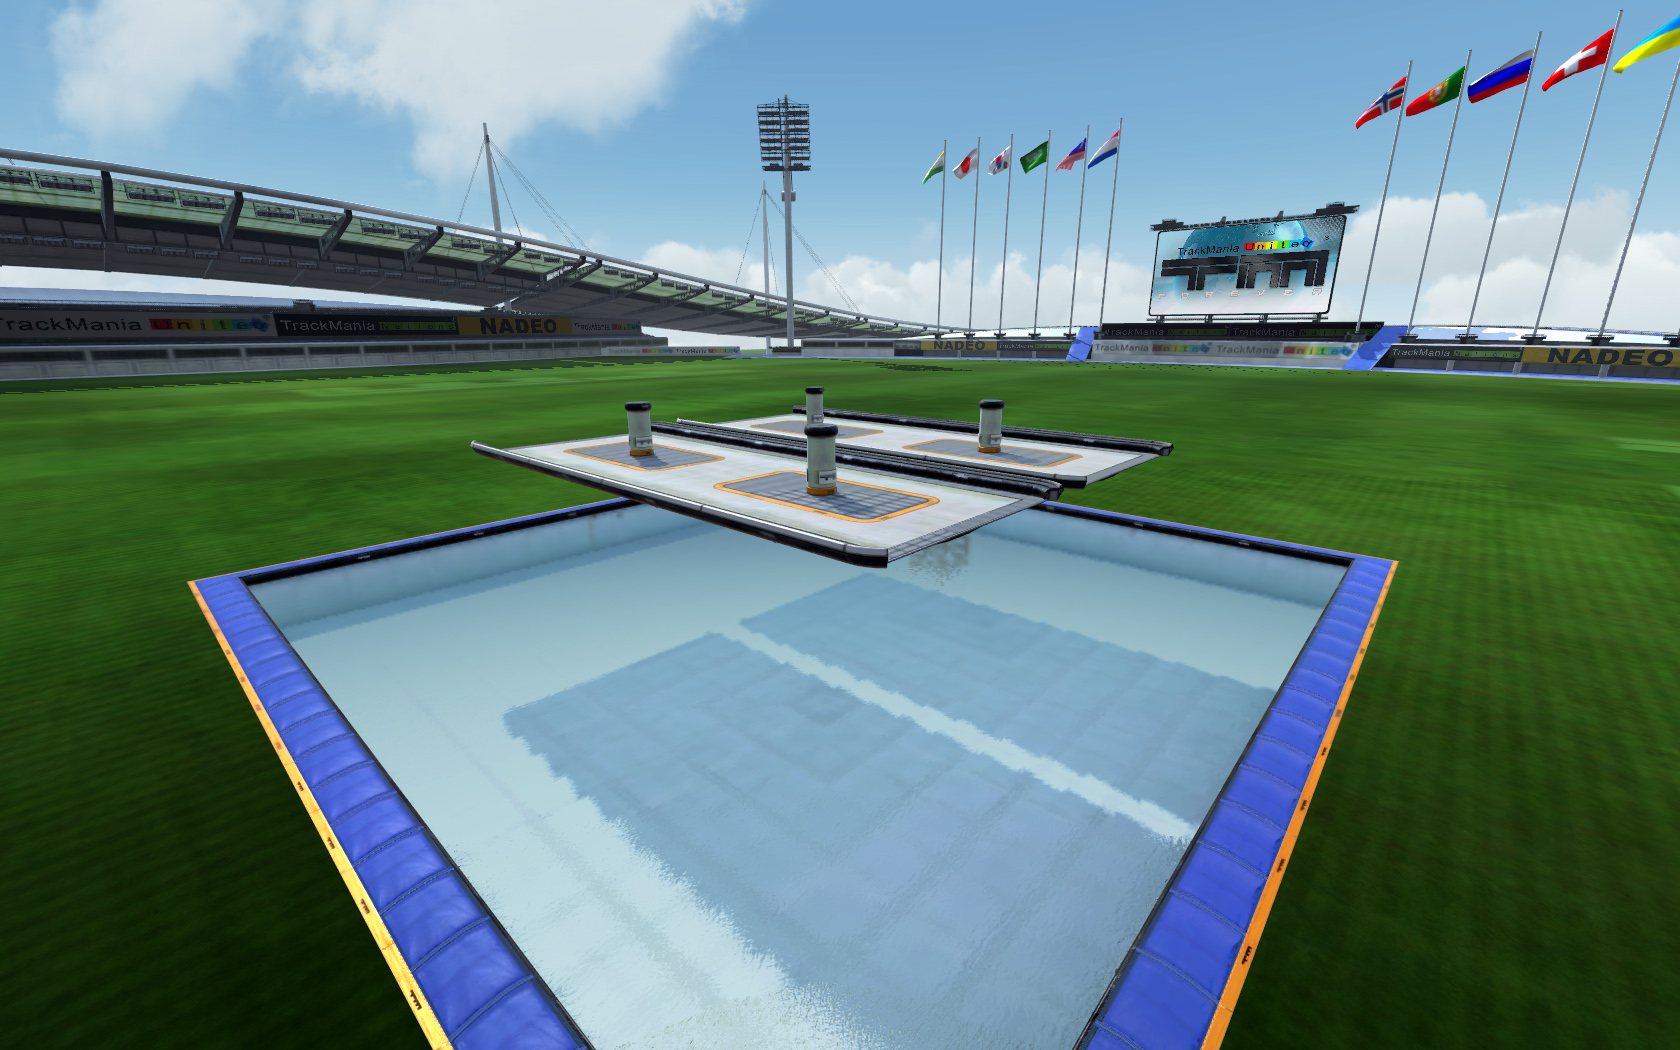
I want to add four grass blocks in the air, so I have placed four transformable blocks where I want the grass. I have chosen the block "StadiumHolePillar" simply because the block hasn't been used in my map yet. Save the track and go to CE.


  1. The first thing you have to do is to select the primary block. The primary block is the first block you placed of its kind. The primary block is marked with a "-P" as you can see in the screenshot. When you change the primary block's name, all the other blocks of the same kind will also be changed.
  2. When you have selected the first block (the first StadiumHolePillar in my case), you have to press the "unlock" button. This allows you to change the block type of all StadiumHolePillars. Press OK.
  3. Step three is to select the block "StadiumGrass" from the block list. Do not use StadiumGrassClip.
  4. Press "Save block modifications to memory". You will now see that all the blocks of the type you chose, have changed name to "StadiumGrass".


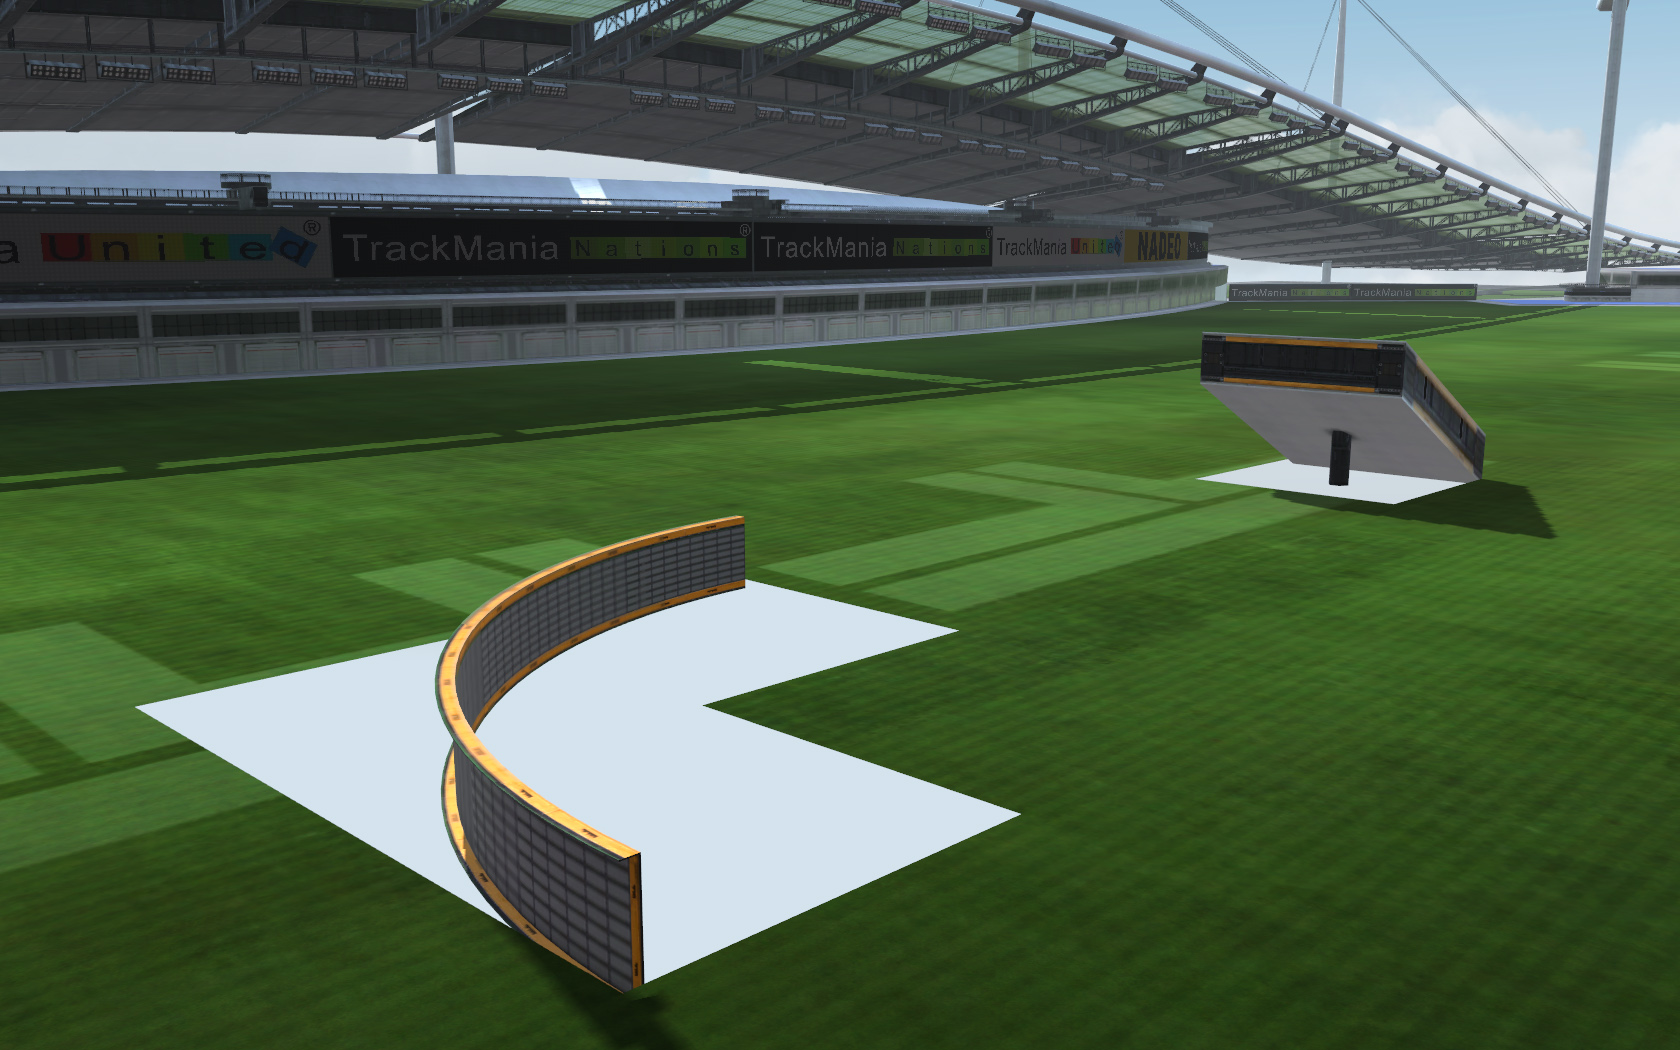
You can now move the grass blocks around if necessary. Save the map. You should now have grass in your track.


Double-mixing
For some reason, mixed grass and/or water will sometimes just disappear from your track after you transform it, but it will still be in the block list in CE. To make the grass/water visible again, simply repeat the process so you have two grass/water blocks on every block. Your grass/water should now be visible again. Sometimes grass/water will disappear from CE as well, if this is the case you have to re-do everything.

Tips and tricks
The back button
Never use it. The back button has an habit to magically unmix stuff. Variation 16 mixes will be lost, grass will disappear and Trackmania will often crash. Never use it. Use the delete button or hide the blocks with CE if they are undeletable.

Fill gaps
Have you ever had a hole into "infinity" on your track? This is caused by many things, and a grass block is the cleanest way to fix this. This will even make cool and new tricks.

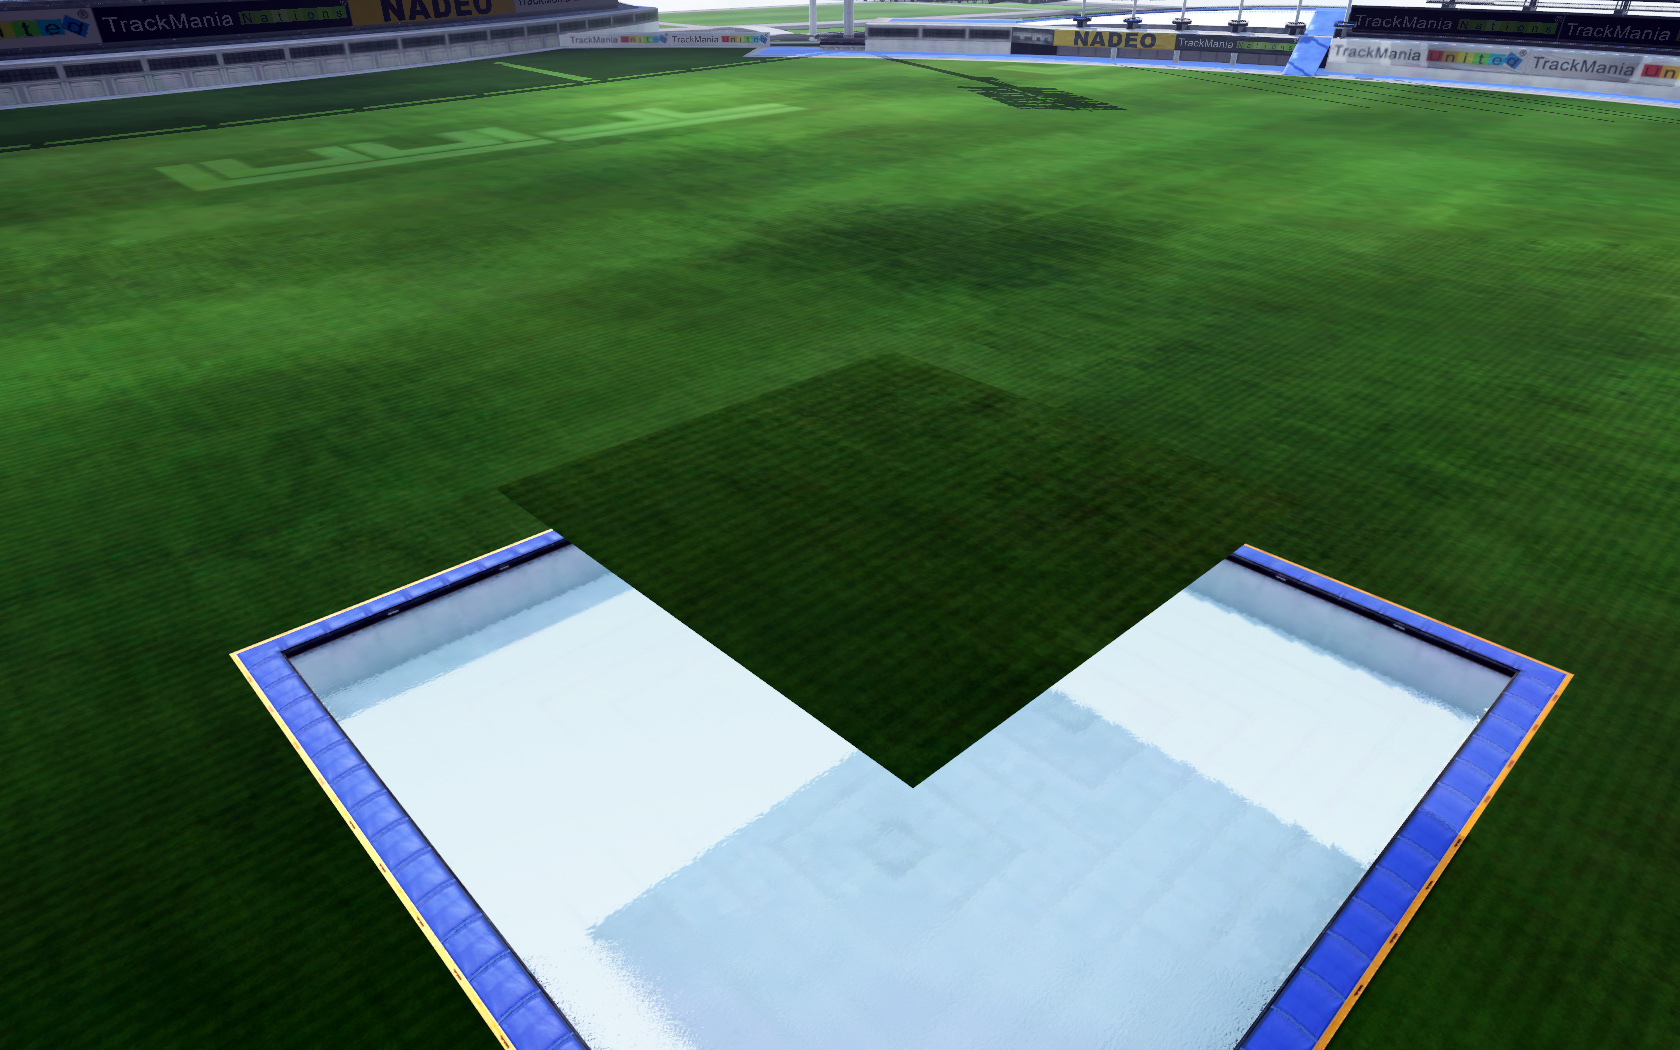
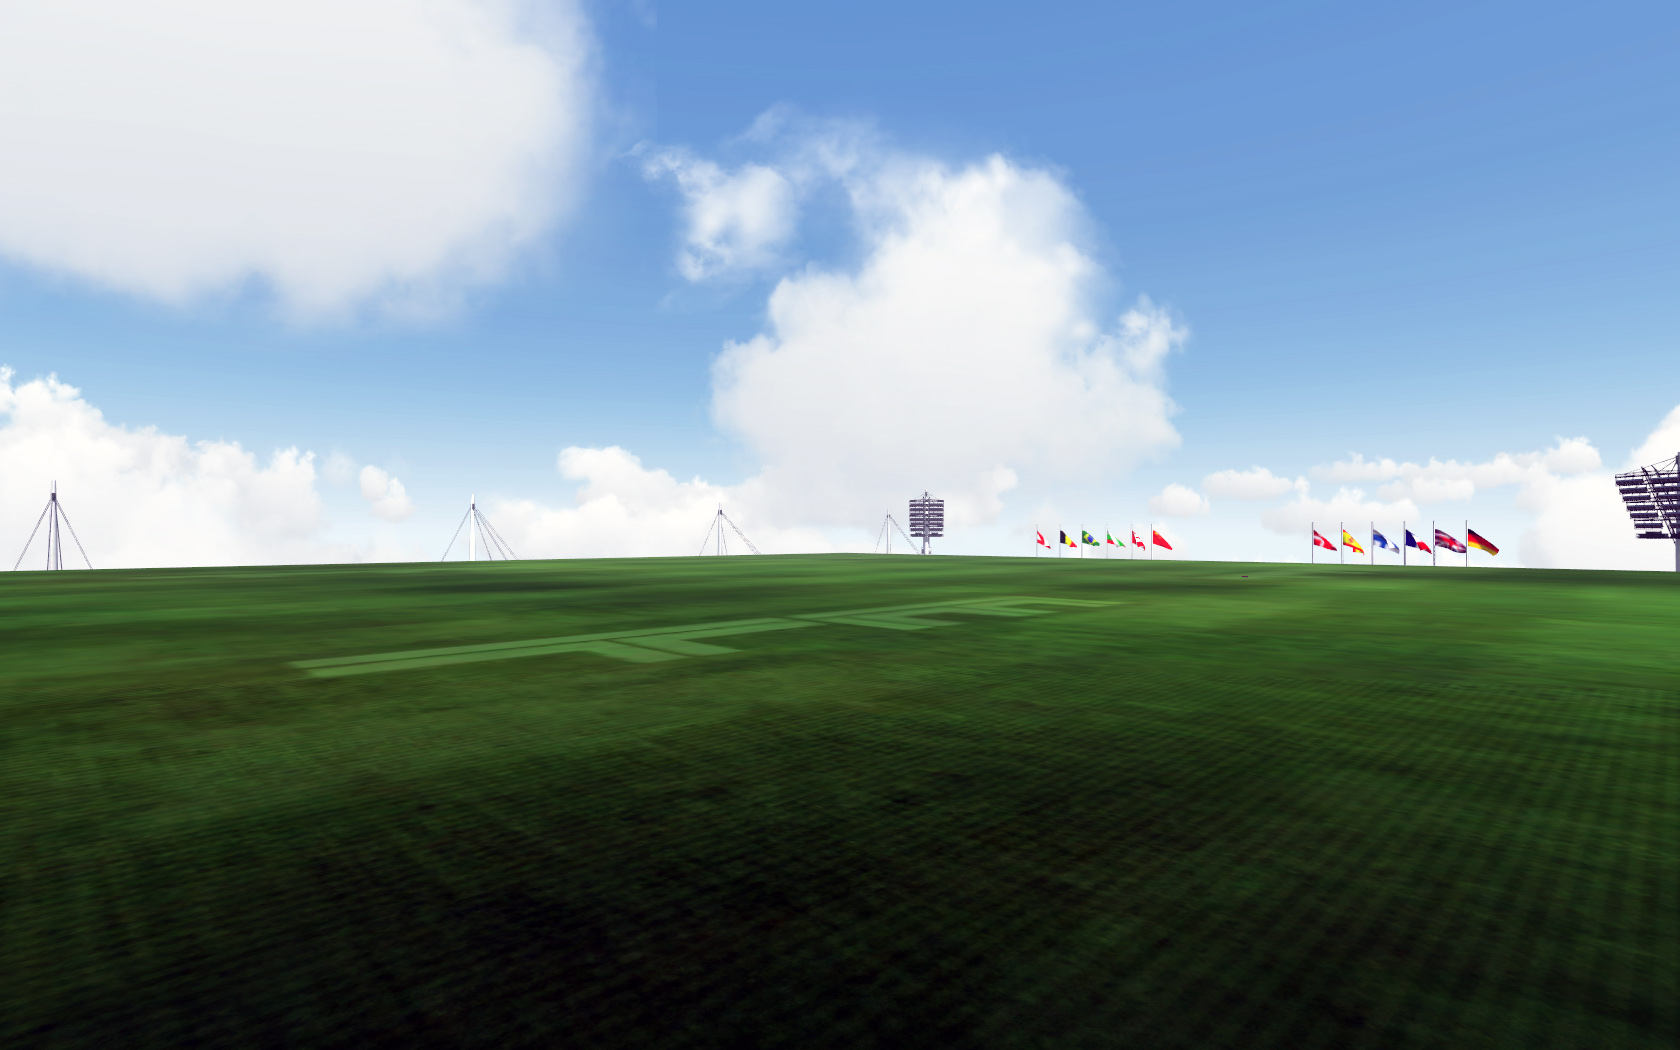
Here you see what happens when you mix various blocks to Z=1. Holes.


And here is what happens when you fix it. Pretty nice? All you have to do is place grass blocks in the gaps with Z=0 (you might have to double mix).


Make entire floors
Ever wanted to make a multi-level map? Well now you can. Just add grass blocks to the entire stadium and you have a new floor. You can even start your track on a higher level and then work your way down. This will make some pretty cool mixes too. You can place high blocks underneath the grass and only parts of the blocks will go through the grass. This is limited to Z=0 on the normal grass, but now you can use even higher blocks and other types of blocks. Experiment.


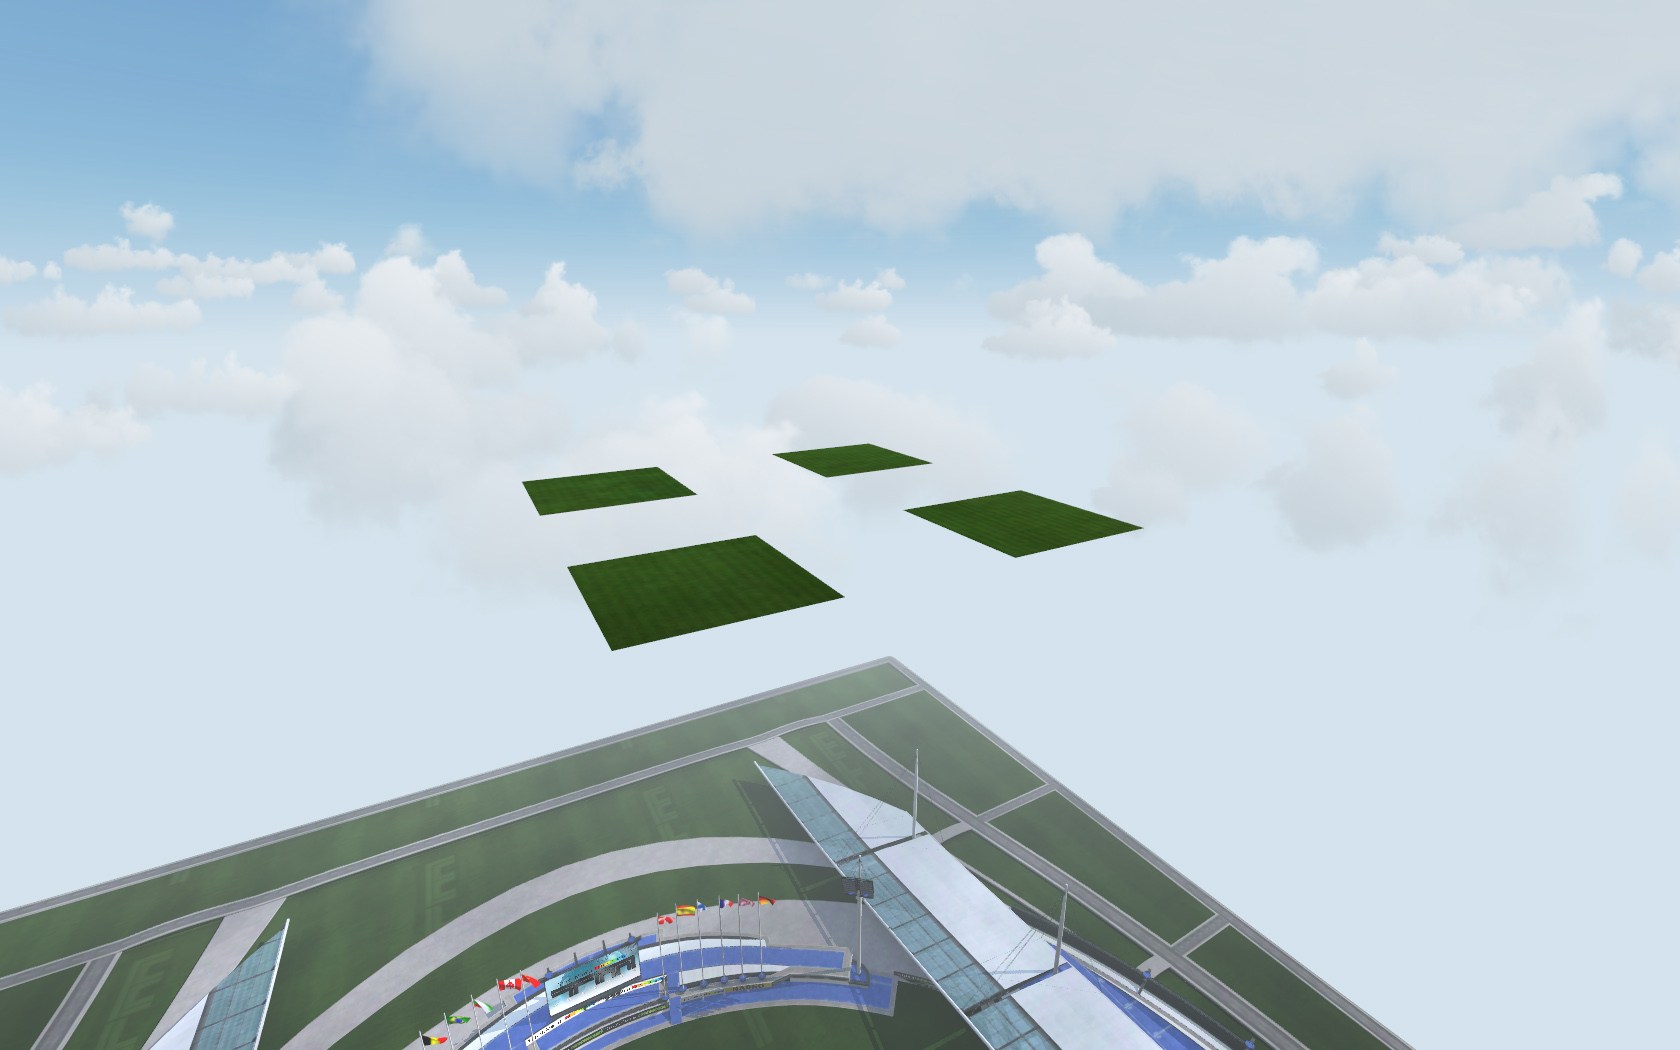
It works above the stadium
Yes, you can blockmix grass blocks above the stadium, but not outside the X or Y coordinates. With creativity you can make some really unique tracks with this method (I have an upcoming map myself with this trick).


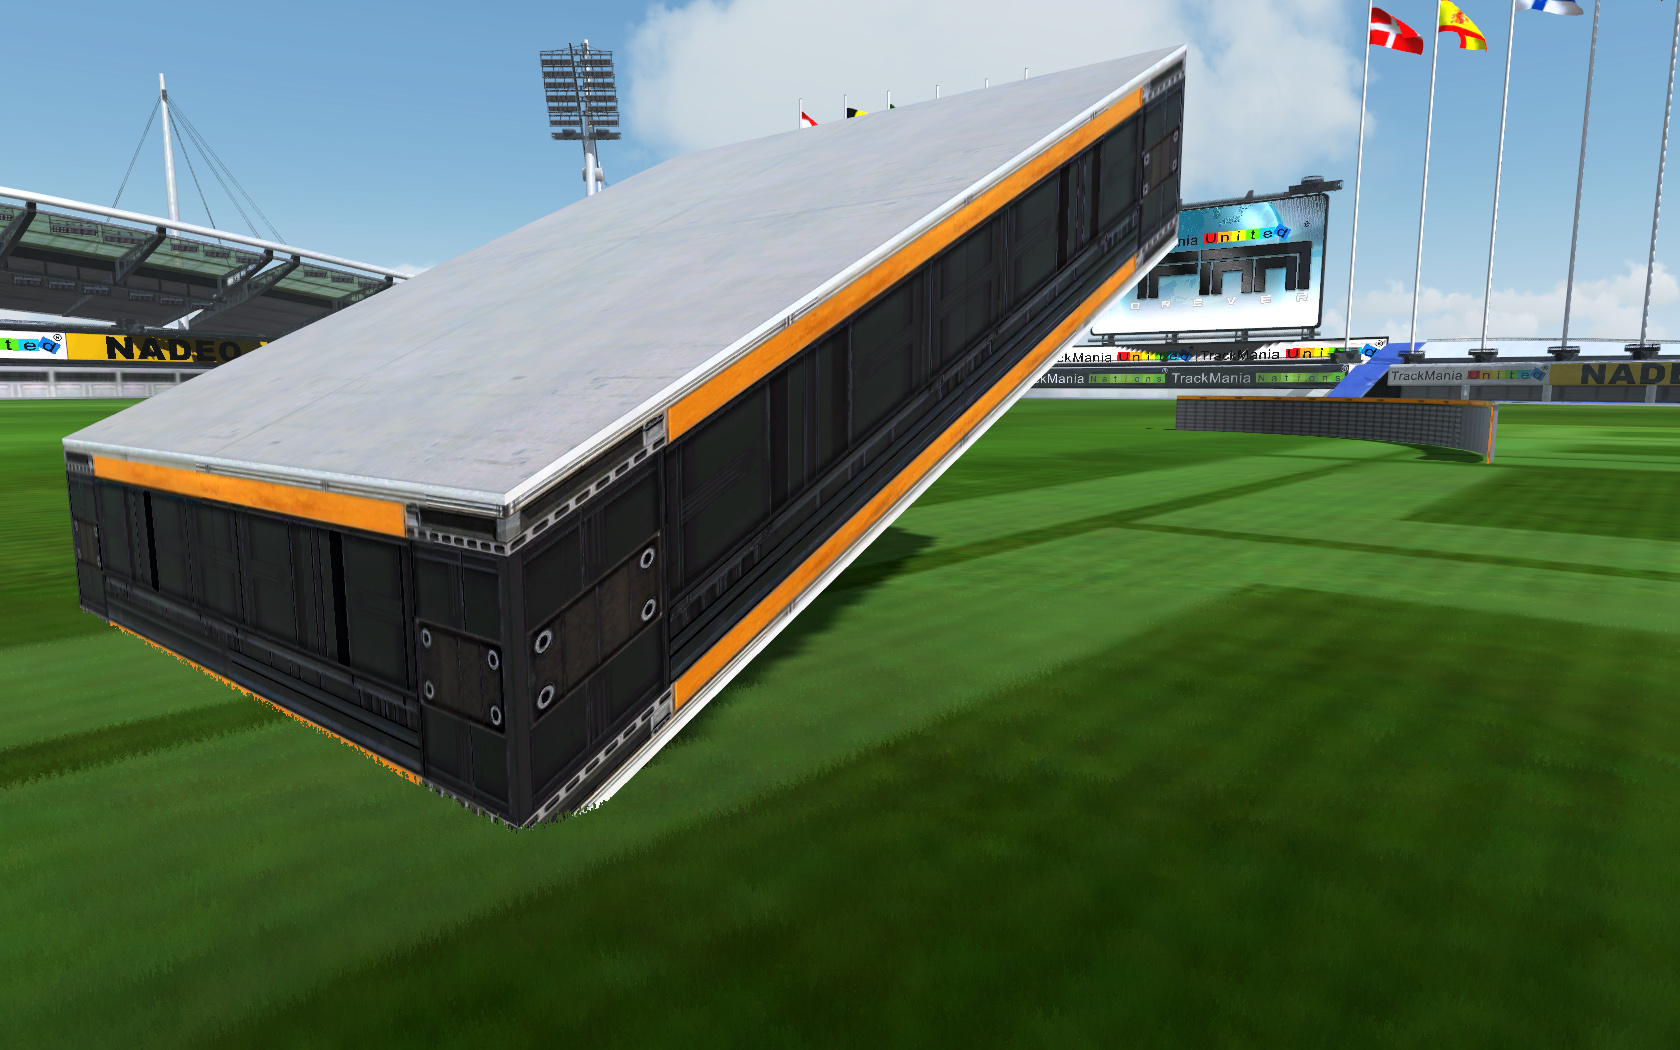
Grass is invisible from beneath
This is cool. Why? Well, you can make traps and you can make bugs. Be creative.

3D models conversion tutorial - extending model sizes

|
This article is written by sol666, his second tutorial on the RPG blog. This time he explains how to "hack" Nadeo's Maxbox to create custom models larger than the standard maximum size. Understanding and reproducing this tutorial will require the possession of 3dsmax and prior knowledge of 3D modelling in TM. I made a short video to show some examples:


A short guide on how to convert 3d models bigger than Nadeo's maxbox

First of all, I assume you know how to create / import models for TM in general, so I leave this unexplained.

Step 1: import / build your model and finish it (position, size, object names, textures,...)


Step 2: place all pivots at 0,0,0 (might not be necessary, but I prefer doing that for easier downscaling / not having to move the complete model after scaling. So this might not work for moving parts although I didn't try yet). Affect pivots only!
Press the image to see a larger version.


Step 3: Reset xform to all objects of the oversized model.


Step 4: re-convert all objects into editable mesh and export the complete model to *.3ds (export might not be necessary, but I sometimes had trouble when not doing that)


Step 5: import the oversized model into a new empty scene.


Step 6: switch to pivots mode, resize all objects to fit into Nadeo's maxbox (affect object only!). I always resize each object on its own, never all together. Having placed pivots at 0,0,0 is a big advantage then. You can simply scale each object down to xx percent. better scale it much too small than a little too big ;)
Press the image to see a larger version.


Step 7: import a working 3d model (also helpful to see if the downscaled object fits into maxbox). Delete everything of it except one object. rename this object to some unused name (i always use sDummy).


Step 8: switch to vertex mode and delete everything of that new object except a vertex ( you can also leave the complete object, but that might look strange ingame ;) )


Step 9: mark all objects, switch to pivots mode and reset, transform and scale.
Press the image to see a larger version.


Step 10: export as .3ds and convert with TM (remember you need MainBody.gbx and MainBodyHigh.gbx, so you might need to do this for two models...)


That's all, hope I was able to help someone.

Cheerz, sol666 / =RR= arian sunnO)))

MT trigger conditions tutorial

|
The following article is written by sol666, an author who just recently tapped into the field of RPG with his first RPG-tracks Apocalyptic Hybrid, Orion Invasion and Ghouls. He was so kind to create a tutorial explaining a specific MT feature he used in these tracks, so many thanks sol666 for sharing this knowledge!


Here is a short guide on how to use conditions in Trackmania's mediatracker.

I'm sure you all know how to place triggers in the mediatracker and how to make them do something, so I won't explain that.
What maybe not all of you know is that these triggers can have the following conditions, which you can change by simply clicking on it:

- none (standard)
- racing time <> x (does not work online!)
- already triggered x
- speed <> x
- not already triggered x

Now "already triggered" and "not already triggered" are those of interest. If you have ever wondered about the number behind that condition, the answer is very simple. It is the id of the trigger, which gives the condition. When placing a trigger in mediatracker, it automatically gets a unique id, starting from zero. So the first trigger you set gets id "0", second trigger gets id "1", ... really simple. And basically, that's all you need to know :)

Here is a short example how to use these conditions ingame, taken from my map Orion Invasion:


Let's assume the following situation (you come from the cp in the middle of the pic and drive "north"): An area of the track is guided by a motion detector (red). You can't pass without having the code to deactivate it. This is how i did it:

First I set the following triggers:


  1. id 1: contains the alert / blackscreen (red)
  2. id 2: contains the message that you used your key (not really necessary, just information...) (yellow)
  3. id 3: contains the key you need to pass (green)


Trigger 1 now should only be activated, if you haven't found the code (trigger 3) yet. So I set its condition to "not already triggered 3".


Driving there without having passed trigger 3, you get an alert. Having passed trigger 3, nothing happens.

Trigger 2 gives you the message, that you used the code and deactivated the motion detector. As this should only happen after you found the code, I set it to "already triggered 3".


Driving there without having passed trigger 3, nothing happens. Having passed trigger 3, you get the message.

Trigger 3 now doesn't need any conditions in this case. It simply informs you that you found the code you need to pass trigger 1.


And that's basically all. Surely it gets a bit more complicated when there are more CP's between the triggers. There are a lot of possibilities on how to use this, I think. It's just up to you / your creativity.
For the programmers of you: a big disadvantage of this method is, that it only allows "if-cases". There is no "else". And hell, I would have needed "else-cases" a couple of times.

A useful tip: name all triggers you place with the id it has, just as i did. It really helps a lot when you have pages full of conditions. On this very track I used 41 ingame triggers, and I would have been lost without knowing which id does what.

Hope I was able to bring some light into the darkness of mediatracker conditions ;)

Cheerz, sol666 / =RR= arian sunnO)))

How to extend the maximum allowed time for records in Xaseco

|
(Note: this is a guide for RPG server admins)
(Note 2: this is guide is incomplete and soon obsolete)
Driving long RPG's for the first time is probably the best part with RPG for me. Only then I get the adventurous feeling that RPG's are supposed to have. When you finally finish, you of course want to be rewarded for your hard work, by getting a spot on the local records list. But there is a problem: there is a upper limit for times in Xaseco of 139:48.60 minutes (or roughly 2.3 hours). Any record above this time, will show up as exactly "139:48.60". Read on to find out how to extend this time limit to 279 minutes (or roughly 4.6 hours).

To fix this, you need to do some changes in the Xaseco database. Only the host of the server (often, but not always, the MasterAdmin) have access to this. You do not even have to shut down Xaseco to do this, but I can not confirm that the records from the track you are currently driving will be saved when the track changes (although I can't see why they will not be saved either).

Method 1 - PHPMyAdmin
Go to your PHPMyAdmin site, log in and find the Xaseco database (it's called "3tmf_xaseco" on my screenshots, but it can be named anything).

Press the image to see a larger image.
Click your way into the "Records" table, located in the left menu.

Press the image to see a larger image.
On the "Score" field, press the "Edit" button (as shown on the screenshot).


Under "Attributes", select "UNSIGNED". Press Save. That was all, your server can now accept times up to 279 minutes.

Method 2 - MySQL Query
Note: I have not tried this myself, but it will probably work, as it's just the same as above, just in command form.

This is for people who do not have access to PHPMyAdmin, and only a MySQL query console. To change the "Score" field from a signed to an unsigned mediumint, copy this SQL query:

ALTER TABLE `records` CHANGE `Score` `Score` MEDIUMINT( 9 ) UNSIGNED NOT NULL DEFAULT '0'

And that's it. Everything should now work.

The theory behind this is that by default, this database field uses a signed mediumint (3 bytes). The minimum and maximum values for this numeric data type are -8388608 and 8388607 (milliseconds, or 139 minutes). When you set this field's attribute to an unsigned mediumint, all you do is make the minimum value go to 0, hence making room for more numbers on the positive side. So an unsigned mediumint goes from 0 to 16777215 (milliseconds, or 279 minutes). This is the maximum value you can get without going up to 4 bytes (int). I'm no SQL expert myself, so you can read more about numeric data types in the official MySQL documentation.

RPG for beginners: optimized input settings

|
 
Game pad and keyboard settings for RPG fans: Optimize your controller settings for RPG to prevent DEL-key accidents :->


Especially important in many Adventures is 'booster-drifting' (aka power-sliding or 3-key-drifting): It is essential that the keyboard processes all three pressed keys. Sometimes it is necessary to reassign the keys for the combination of left,right,throttle and break.


Tecfan about booster-drifting:"'If you can only drift in one direction, and not the other, it is because your keyboard has some limitations. Then you need to bind a second button as brake. To do this, in Trackmania, go to `Profile´ , and then `Inputs´.'"


The importance to hide the DEL key as good a humanly possible is often underrated. But it becomes painfully clear when DEL is pressed accidentally: Poor JumperJack, the latest Del-key victim might agree^^ that it is the most important key to reassign for a lighthearted RPG-experience.


JumperJack in TMX-Forum:


For left-handed folks (like Ned Flanders or C. Montgomery Burns :->) the next tip may not be an improvement, but for the many Trackmaniacs, that are right-handed, the assigning of the free-camera-keys 4,5,6,8 to A,S,D,W will bring some additional comfort. The left hand on the keys ASDW, like common in many games will make navigating with Cam7 very comfortable.


RPG for beginners: brighten your RPGs

|
Some might like their dungeons dark and dangerous^^, for all who want them as bright as possible, have a look at the following screenshots and tips.

To change the settings for the lightmaps go into the launcher.


For maximum brightness set the lightmap-quality to 'No shadows'.


Setting the quality of the lightmaps to 'No Shadows' will not have an influence on already calculated lightmaps, so you have to delete already existing lightmaps in your cache.


There is one exception i know so far:
The mod 'Under the Seas' (used for example for 'Poseidon's Wrath')  will be too bright without shadows.

So you may not want to delete the lightmaps for tracks using this mod.

As mentioned above if you keep the already calculated lightmaps in your cache-folder, you still will see the effects, even if you have set the lightmap-quality to 'No Shadows'.

This way you can have it both ways, see the effects of lightmaps that come in handy and enjoy brightness in dungeons that otherwise would be very dark.


Some videos showing the difference:


MIPmap-effect Texture Guide

|
A few days ago TstarGermany made me aware of this video featuring a new texture-technique ,called "Mipmap-effect", with which the appearance of textures can be changed ingame dynamically. Basically this technique makes use of the MIP maps which are contained in every .dds-file. By default, MIP maps are smaller replica of the original image and serve the purpose of showing textures in the depth (from the players point of view). They can be modified though to represent completely new textures.
But forget about the technical side first, let's watch this video that shows some of the ideas I had for it with regards to RPG.


These are the textures which I have changed in the video's mod (in order of appearance):
· StadiumPlatformD.dds - rotated the standard image 90°, kept MIP maps untouched
· StadiumWarpAuvent2D.dds - made the horizontal and vertical lines in the standard image white, kept MIP maps untouched
· StadiumPillarD.dds - added transparency to the MIP maps, standard image no transparency
· StadiumRoadTurboD.dds - added arrows to the standard image, MIP maps without arrows
· StadiumPlatformFloorD.dds - transparency added to standard image, MIP maps no transparency
· Advertisement Sign ("157285") - added numbers to standard image, MIP maps no numbers

All those textures and many more with transparency can be downloaded here: http://www.vinummusik.de/Trackmania/MipMapTextures.zip


So here is a small guide on how to do these effects.
You will need a program that supports the dds-fileformat and can display Mip maps, like Photoshop.
Open a diffuse .dds-file of your choice (normal and specular maps work as well) and then make sure to check the "Load MIP maps" box.

You will see that an image appears which is divided into two parts. On the left side the standard image is displayed, on the right the MIP maps are shown (in this case 9 MIP maps). The standard image is being shown when the player is very near an object which displays this texture; the 9th MIP map is shown for the biggest distance to an object. You can edit any of the Mip maps now.

For example for making the texture invisible for a certain distance, go into the channels-menu in Photoshop and add an Alphachannel by creating a new layer (if not already existing). White represents no transparency and black 100% transparency. Below, the image is completely transparent.

If you want the texture only to be transparent in the distance, make the Alphachannel of the standard image white. I also made the first Mip map grey to get a smooth transition ingame:

Save the texture in DXT1, 1 bit alpha and check the box "Use Existing MIP Maps:

When having understood this, modifying the color and appearance of the individual Maps is very easy. Here I added numbers to the standard image. Players would now first see no texture, then a brickwall, then a brickwall with numbers when approaching the texture.


A tutorial on TMC can also be found here: http://forum.tm-creative.org/thread-1922.html

I haven't tested this technique long enough to give an accurate evaluation about the potential applications in RPG but it's looking quite promising. The question will be how alphachannel modifications can be integrated in a useful way and to which degree modifications on the RGB channels will be used except for graphical gimmigs. Is it possible to change atmoshpere's with this? Can new challenges and enigmas be created (I think signs hold great potential here)?
Leave your thoughts, ideas and maybe even experiences in the comments :-)

RPG Track building - techniques, features & resources

|
There are some features and techniques around track building that can only be learned by long enduring self-testing or by other's experience - and as information are sometimes hard to find, I'm trying to cover here some things that are especially related to RPG track building.

But first of all we would like to announce that we now offer a zip-archive with a collection of all mods we list in the 'Mods'-section. If you already have many mods saved in your "...skins/stadium/mod"-folder then it will be easier downloading the files individually from the mods section, but for newcomers this 900mb big file will be useful both for racing and track building.
Many thanks to fallen.soul for hosting the file:
www.vinummusik.de/Trackmania/RPG_Mods.zip


The first thing I wanna show is how to control ColorFX-effects in the MediaTracker for far- and near settings, like Enai Siaion did on his track 'Ex Gehenna', creating a fog-like atmosphere. Hageldave already made a very complete video tutorial about this a few months ago, so I recommend watching this:


If you are familiar with RPG tracks, you probably already have seen Platform blocks that are cut off at their bottom end to form a gap one can drive through. In case you don't know how these can be created, here's the explanation:

The first step is to create a heightened dirt area and place the platform block ("StadiumCircuitBase") directly on the heightened dirt, which would look like this:

Save the track and open it in ChallengeEdit (Download CE). Search for the block "StadiumCircuitBase", click it and then increase the Z-value by your preferred amount (it will raise the block).Click on "save block modifications to memory" and then save the .Gbx-file. When having done everything correct, you should see a shortened platformblock as shown below.

An even easier way of achieving this effect is to place the platformblock at the actual designated area and change it's Variation2 in ChallengeEdit to 16. The platformblock will then be shortened even without being on the ground. If you don't know how to change a block's variation, read the tutorials below.


Water blocks are very often used in RPG's but they have the negative side-effect that it's not possible to build under them and are hard to modify. I will detail a quite easy method of dealing with this.


Instead of taking the water blocks from a stadiumpool, we simply put other blocks on the exact same location we want the water to be and then transform the blocks into stadiumwater. Any block will work but I recommend picking one that you will later never use in your track, in my case the finishline-block.

Load the track now into ChallengeEdit and select the first "StadiumRoadMainFinishLine"-entry. The first block of one block type that has been placed in the editor (and is thus also shown first in the ChallengeEdit-block's list) is always the primary block for this specific block type which is marked with a "-P" before it's name (look picture below).
When having selected the primary block, you can now click the Unlock-Button below the block list and select a different block type (in our case StadiumWater). Pressing on "Save block modifications to memory" will then change all Finishline-Blocks to Stadiumwater.

With this result after having saved the .Gbx:

If you are now not pleased for example with the pipe that goes along under the water or want to add blocks under the water, you just have to reverse the process and turn the primary "StadiumWater" into "StadiumRoadMainFinishLine".


This process of transforming blocks can also be used to create dirt areas in the air very effectively.
Here's how my example looks before and after some editing in ChallengeEdit.

The end result is a natural-looking dirt area consisting of some dirt hills and flat dirt. For the flat dirt I placed Finishline-blocks and transformed them in ChallengeEdit into "StadiumDirt". The dirt hills I created by putting "StadiumPlatformLoopStart"-blocks on their location and transformed them into "StadiumDirtHill".

The problem though is that the dirthill-block comes in three different shapes. Just transforming a primary block into dirthill will produce the same shape for all dirthills, as can be seen in my example:

For this problem ChallengeEdit also offers a solution, the variations.
When having selected a block, at the lower right side of ChallengeEdit will appear four boxes with the according texts "Variation 1", ..2 etc. By default, all values in the boxes are at zero.
Because in the previous picture the variations of the dirt hills haven't been changed yet, they are in the shape of Variation {0,0,0,0}. For block 109 this shape is already correct so we don't need to change it, only rotating the block is necessary. By changing Variation 1 to "9" and Variation 2 to "16", we get the curved shape of the dirthill which we need for the blocks 105 and 112. The third shape (not curved) can be created by changing Variation 1 to "5" and Variation 2 to "16" which we need for all the blocks that are left.


The last thing I want to show also has something to do with the transform-feature of ChallengeEdit - but with the end result of mixing blocks ingame.

For this we first need a large area of blocks, all of the same type. In the example I'm going to use the FinishLine-Block again. The blocks need to cover the area completely without spaces. After having done that, save the track as a copy so you can later use it as a template. Start adding blocks over the area now. It looks like this in principle:

Change the primary FinishLine-Block now into some other block in ChallengeEdit ("StadiumSculptB" is probably best suited for this) the same way I already explained in the other tutorials. The StadiumScluptB-Blocks are mixed with the other blocks now and after deleting the Sculpture-Blocks, you can freely mix new blocks into the already existing blocks inside the editor. The blocks that were mixed with the Sculpture-Blocks always stay mixable, so even if you added new blocks to them, you can delete them and add different blocks.

This technique is mostly only useful for experimenting with blockmixes, not for making regular blockmixes in a track project as it is more time-consumptive. But the advantage when experimenting is that you can always test the mixes directly in the editor and can change them directly if needed.

For more detailed information about Blockmixing and ChallengeEdit, visit TM-Creative

Any questions left? Ask away in the comment section :-)

RPG for beginners: booster drifting

|
This tutorial will help you overcome one of the most common obstacles in RPG: backwards boosters. This method works on both kind of boosters: flat and angled.

Occam has made a video tutorial on how to do this (the explanations are in the annotations, so if you watch the video on youtube.com, be sure not to have de-activated annotations)


Enai Siaion made this description and picture to explain booster drifting:

"You have to 'tack' against them (hold down the gas and the brake to do a burnout, and do 'half donuts' from left to right across the boosters)."


To master this (which is not difficult at all), I suggest you practice on the ground first. Try to drift first left, and then right, 180 degrees at the time. If you can only drift in one direction, and not the other, it is because your keyboard has some limitations. Then you need to bind a second button as brake. To do this, in Trackmania, go to "Profile", and then "Inputs".


Find "Brake", and just press the line. You are now given the option to add another key for brake. To set "W" as your second brake key, just press it. You will now have two buttons for brake, like I have in the screenshot: Arrow_up and W.

To drift now, press these buttons: Arrow_up, W and either arrow_left or arrow_right.

Any questions? Just ask.

Guide: How to improve your RPG- track

|
Guide: How To Improve Your RPG-Tracks

You builders all know the feeling when you finished a track and you’re thinking .. “Hhhmmm... Is this track good enough for online playing?”.. Well I went searching for the best ways to improve your tracks!

Before Building
- Drive some inspiriting tracks. (But not copy them)
- Have a good idea of what to build. A temple, Pyramid, Ruine, City etc.
- Take a look at mods to get inspirated. Atmosphere is very important!

While Building
- Insert as much as new parts in your track as possible.
- Make sure every CP is respawnable
- Make sure the way is clear! This is the most important thing!
- Make good scenery to make the track look good. Otherwise you have a trial track.
- Make a story . This makes players want to play further.

After Building
- Drive your track more then once, so you’ll recognize bad or boring parts
- Ask some people to test your track! They are objective and sometimes see what you ,as builder, can’t see.
- Add MT to the track for stunning special effects and hints & tips.
- Make sure your track has every thing it needs for online playing.


I want to thank the players who gave me advice about what they like in RPG tracks or how they build them. Big thanks guys! These guys are awesome in the editor and have the building skills, check their tracks!

Eie, Enai Siaion, Kryw, HawkGer & Fish

How to add an auto-downloadable mod to your track

|
Follow these simple steps to get a mod auto-loading for your track. Notice that there are different steps if you are starting on a new track and are adding a mod to an existing track. If anything is unclear or if you have questions, please post them in the comments.

Warning! To make this work, there has to be at least one mod in your mod folder, but not the mod you are going to use! This might sound confusing, but if you already have the mod you are going to make auto-downloadable in your mod folder, your track will assign the local file, and not the URL to your track.

Step 0: Create a mod folder and add a mod file to it
If you have never used mods before, you probably don't even have a mod folder. Then you manually have to create it. Go to your Trackmania folder, which is located inside "My Documents". Then go inside the folder "Skins". If you do not have a folder called "Stadium" inside the "Skins" folder, create it. Inside the "Stadium" folder, create another folder called "Mod". The folder structure should then look like this:


On my English Windows Vista the path looks like this: C:\Users\Tecfan\Documents\TrackMania\Skins\Stadium\Mod\

Now open the "Mod"-folder, and paste a mod file in this folder. A mod file is only a big .zip file, which you must NOT un-zip. I repeat, DO NOT unzip the .zip file. It is required to use a .zip-archive, .rar or .7z archives won't work. If you do not have any mod files available on your PC, you can download one from our Mod overview page. In order to load the mod, Trackmania has to be restarted once. We can now go into "Editors" and add a mod to a track.

If you are going to create a new track
Step 1: Go into the Advanced editor
First, press "New Track" and then go into the Advanced Editor


Step 2: Hold Ctrl while you select one of the moods
Here, in the "Select a decoration"-window, you have to HOLD DOWN Ctrl on your keyboard while you select one of the decorations with your mouse.


Step 3: Press Select URL
You will now see this mod selection screen. If you do not have any mods in your mod folder, you probably won't see this dialogue. Read the start of the guide to fix that. Here you will see thumbnails of all your mods, and you can also select them. The problem with selecting a mod just from your local mod folder is, that if other people want to play your track with the mod, they have downloaded the mod manually and placed it in the mod folder in order to see it. This means that very few people will see the mod online. Most people will only see the default skin.
So we are not going to select a local mod, (but) we are going to press the "Select URL" button. Then, everyone who plays your track, including you, will automatically download the mod from the internet while driving the track (you might have noticed the orange loading bar in the upper right corner when you play). The mod will be placed in everyone's Trackmania cache.


Step 4: Insert or paste the URL to the .zip file containing the mod
In this window, you have to insert or paste the URL of the mod (the URL will end with .zip). This is called a direct link. It is required to use a host that offers direct linking, else Trackmania won't be able to download the file. If you need help with this, you can contact me, and I will help you.
Remember to include the full URL, including "http://". An example of a mod URL is "http://tecfan.nitrolinken.net/tm/mods/Forest_mod.zip". You can find many more mods if you go here! Press "Ok" when you are ready. You will now get back to the "Choose skin"-window. Do not touch anything, and press "Ok" again. You will now go into the track editor.


Warning! The following steps won't work if you already placed the mod locally in your mod folder.

Step 5: Test if the mod locator works
We are now going to test if the just added mod locator actually works. If you already have this mod in your mod folder, you need to move it to another folder (and then restart Trackmania). The reason why you have to do this is that you will not automatically download the mod if you already have it on your computer, it will just use the local .zip file.
So after you pressed the two "Ok" buttons, you will be redirected to the trackeditor. Enter Racing Mode (press Enter). In the upper right corner, you should now see an orange loading bar. This is probably the mod being downloaded from the URL you previously entered. If you do not see this loading bar, you probably:
a) Entered the wrong URL
b) Already have the mod (.zip) in the mod-folder
c) The server is down (find a new host)
d) Damaged mod file (cutted download, the author of the mod has done something wrong, etc.)
e) Turned off downloading of custom files such as mods, avatars, etc.


How do I know if this loading object actually is the mod being downloaded? (also a useful trick when playing RPGs online - to see whether this is the mod being downloaded, or just someone's car or avatar)
Well, you have to press the "+" button on your keyboard twice. You will now see some nice graphs and text on your screen (like on the picture below). You will know that it is the mod being downloaded if you recognize the file name or the file size.

(press the image too see a larger version)


When the orange loading bar is finished (and disappeared), press "Esc" on your keyboard, and the mod should now be active. You can now build your track with an auto-loading mod. Remember to save often!


If you have already made the track
If you have already started on - or completed - a track, and you want to add a mod, do so by following these steps:

Press "Load track" inside "Editors" when you have logged onto your Trackmania account. Now, you have to HOLD DOWN the "Ctrl" key on your keyboard while you select the track with your mouse. After it is selected, you can let go of the Ctrl key. Click "Edit".


You will now see, the "Select a decoration" dialogue from step 2. You do not need to hold Ctrl while selecting a decoration this time though. From now, you can follow the steps (beginning at step 2) of the other section of the guide. If the track you are updating is already on TMX, look below.


What if my track is already on TMX?
Don't worry. TMX has an update function, so you do not have to post this as a new track. In addition to not losing your awards, comments and replays, (only) a mod update also keeps the Dedimania and local records from online playing. You will find the update button on the track page on TMX, as seen on the screenshot. After you press the button, select the updated track file, and press "Continue", and now your track is updated! Remember to tell all the server admins to re-add your track.